Welcome to another tutorial in the Android Testing Series. And this post is called Android Espresso Tutorial that means we are now moving to UI Testing.
Espresso is a Testing Framework for writing Automated UI Tests for your Android Application. With espresso, we can simulate the user interaction in our application; its the same as a real user is using the app, but with espresso, we will automate the process by writing code.
This post will work on the same project that we created in the previous articles, but now the project is fully completed as our target is to learn about testing only. But no worries, you can get my source code; the link is at the bottom of this post.
Table of Contents
Android Espresso Tutorial
As you already know, if you have followed all the previous articles (or videos) of this testing series, we are building an app called “Spend Tracker”. In this application, I have two fragments: one to add a spend to the local database another fragment is to list all the added spends from the database. And in this post, we will test the fragment we are using to add a spend to the database. Below you can see the fragment.
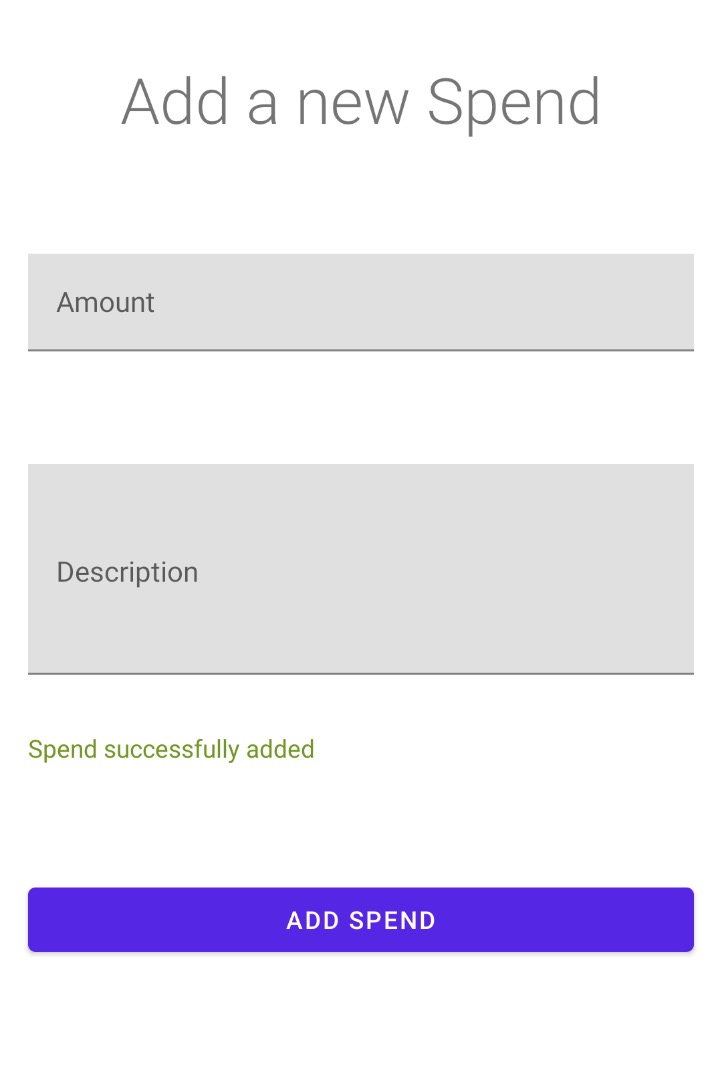
As you can see, it is a simple design, having just two EditText (for Amount and Description) and one button to add the spend to the database.
To test this, we usually run the app on our device, and we manually enter values in the input fields and then click on the button. But today, we will write code to do all these things automatically.
So let’s begin.
Testing Fragment in Isolation with Espresso
The first step is generating a Test Class, and the method of doing it is the same as we did before.
- Open the Fragment Class.
- Right Click -> Generate -> Test -> Ok
- Make sure you create the test class inside the androidTest package because it is a UI test, and it requires creating a Fragment.
This test will also require an actual device or an emulator because it will launch the app on the device for automation testing.
Understanding the Test Class
Below you can see the test class; we will understand everything that is inside this class.
|
1 2 3 4 5 6 7 8 9 10 11 12 13 14 15 16 17 |
@RunWith(AndroidJUnit4::class) class AddSpendFragmentTest { private lateinit var scenario: FragmentScenario<AddSpendFragment> @Before fun setup() { scenario = launchFragmentInContainer(themeResId = R.style.Theme_SpendTracker) scenario.moveToState(Lifecycle.State.STARTED) } @Test fun testAddingSpend() { } } |
scenario: FragmentScenario<AddSpendFragment> : We have defined and instance of FragmentScenario , a class inside the androidx fragment-testing library. With this class’s help, we can create the fragments that we need to test, and we can also change the LifeCycle.State of the created fragment.
launchFragmentInContainer(themeId = R.style.Theme_SpendTracker) : We use this function to test a fragments’ user interface. This function attaches the fragment to an activity’s root view controller. In simpler words, we are launching the fragment here for testing.
moveToState(LifeCycle.State.STARTED) : We use this function to move the Fragment to a specific lifecycle state. In this case, I am moving it to Started State.
Finally, we have the testAddingSpend() function that is our actual test function; but this function is empty now, and we will write the test inside this function.
Writing Test
Before writing the actual test function, let’s understand the espresso components.
- Espresso: It is the entry point for any View Interaction. For example, we have to input some data in an Input Field (EditText). We do this using the onView() function.
- ViewMatcher: We pass a matcher to the onView() function to find the view for interaction. It is a collection of objects that implements the Matcher interface.
- ViewAction: After finding the view, we need to perform some action, for example, a click action.
- ViewAssertion: After performing the action, we will perform a ViewAssertion, for the test result.
Below you can see the actual test case.
|
1 2 3 4 5 6 7 8 9 10 11 12 13 14 15 |
@Test fun testAddingSpend() { val amount = 100 val desc = "Bought Eggs" //Espresso Matcher and Action onView(withId(R.id.edit_text_amount)).perform(typeText(amount.toString())) onView(withId(R.id.edit_text_description)).perform(typeText(desc)) Espresso.closeSoftKeyboard() onView(withId(R.id.button_add)).perform(click()) //Assertion onView(withId(R.id.text_view_success_message)).check(matches(withText("Spend Added"))) } |
Now let’s understand the code.
onView() : The espresso entry point.
withId() : Matching the view using Id.
perform() : Performing the action.
check() : Finally performing the assertion.
Now you can run your test as we did before.
Android Espresso Tutorial Source Code
And as I said, you can get the source code of this project. The source code contains the whole project with test codes. You can get the source code from the link given below.
So that is all for this Android Espresso Tutorial, guys. I hope you found this tutorial helpful and learned something. For any kind of question, just leave your comments below. And if you want to contribute to this website, just share this tutorial with your friends who are learning Android Application Development. Thank You 🙂


