
Hello friends, in the last post we have done all the system configuration for our Android Development Tutorial Series. Today we will understand some basics that will help you in android application development.
Android Development Tutorial using Android Studio
We have installed and configured Android Studio for Android Development. Now there is some basic things in Android Studio IDE which you should know. So lets start
- Open the last project (“Hello World”) in Android Studio (“We created this project in the last tutorial“)
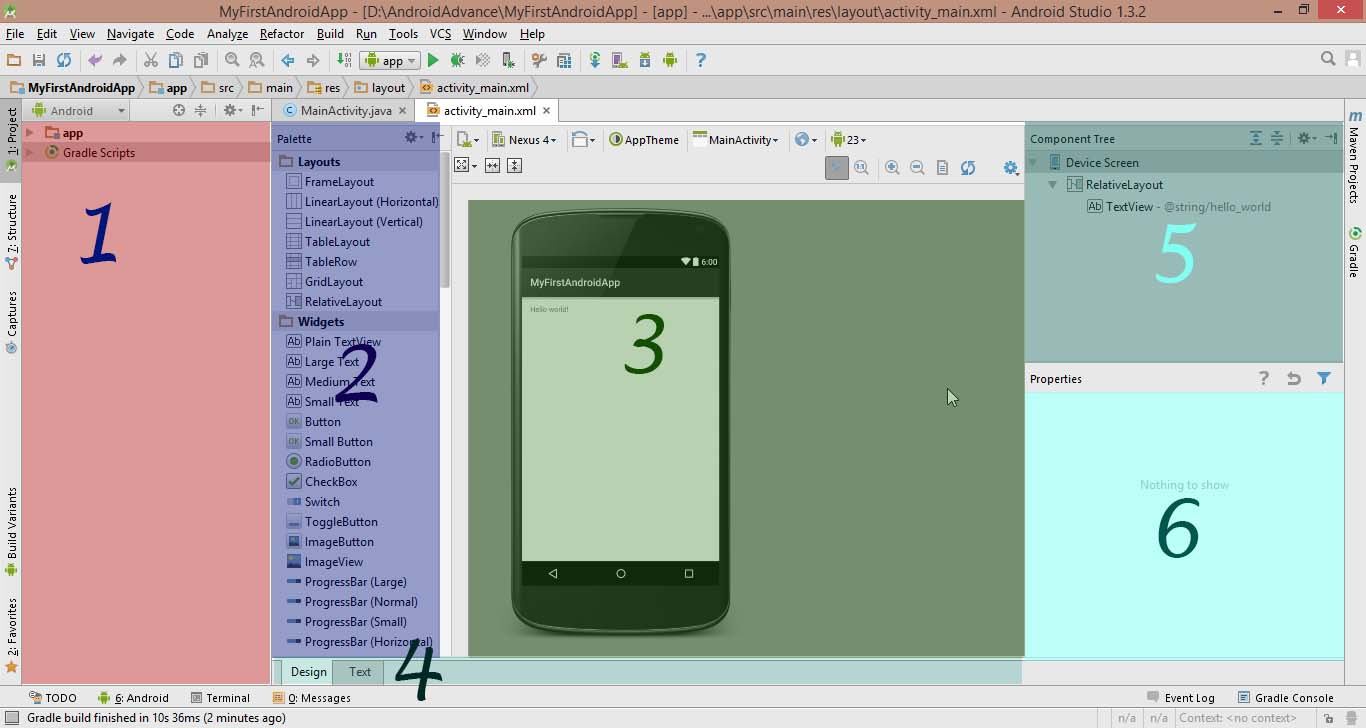
- You will be seeing the above screen after opening your HelloWorld project. I am explaining the above given areas below.
#1
You are seeing two things at number 1. The first is our app directory and the other one is our Gradle Scripts. Extract your app directory.
App Directory in Android Studio
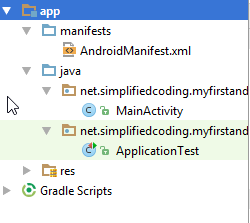
Manifest
- This directory contains AndoirdManifest.xml file. But the question is What is AndroidManifest.xml?
AndroidManifest.xml
- In android every application must have this file. It gives the necessary system about the application to android system. AndroidManifest.xml contains
- Java Package name of the application
- It describes the app icon, theme and label
- It describes all the components of your application like, activities, broadcast receivers, services etc.
- It describes all the permissions your application has to access the restrict part of android system
- It also tells the minimum api level for your application
- You can see the basic structure of AndroidManifest.xml by opening the file (double click to open)
|
1 2 3 4 5 6 7 8 9 10 11 12 13 14 15 16 17 18 19 20 21 22 23 |
<?xml version="1.0" encoding="utf-8"?> <manifest xmlns:android="http://schemas.android.com/apk/res/android" package="net.simplifiedcoding.myfirstandroidapp" > <application android:allowBackup="true" android:icon="@mipmap/ic_launcher" android:label="@string/app_name" android:theme="@style/AppTheme" > <activity android:name=".MainActivity" android:label="@string/app_name" > <intent-filter> <action android:name="android.intent.action.MAIN" /> <category android:name="android.intent.category.LAUNCHER" /> </intent-filter> </activity> </application> </manifest> |
We will also cover these things later on in detail.
java
- The next directory you are seeing is java. It has two sub directories. If you can see the sub directories name are same as your package name. This folder contains all the java source code. You can also create new packages here to organize your java classes. But you have to touch or manipulate only the first sub directory.
- The second sub directory is named package_name (androidTest). It is generated automatically.
res
- This folder contains all the resources for your android application. Inside this folder we have
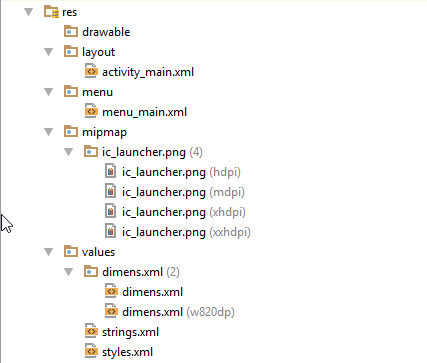
drawable
- Here we keep all the drawable resources like images.
layout
- All the XML files for your activity layouts are stored here
menu
- Menu XML files are stored here
mipmap
- Here we can see the application icon for all screen sizes
values
- Inside values we have a directory name dimens and two xml files named strings.xml and styles.xml
- strings.xml: This file contains all the strings that will be used in our project.
- styles.xml: This file contains the styles and themes for our application.
- Inside the directory dimens we have two xml files that stores the margin values.
Now don’t bother more we will be covering everything again while creating apps in this android development tutorial series.
The next your are seeing in #1 is Gradle.
What is Gradle?
The basic one liner answer is: Gradle is a Build System.
Gradle takes best features of other build system and combines it to one. And because it is an JVM (Java Virtual Machine) based build system we are free to write our own script here. If you are not getting anything then don’t worry we will understand this later on in detail.
#2
Here you can see the components that will be needed to design our application. Things here are very simple we can drag the component from here to #3.
#3
This is the visual layout you are seeing of your application’s screen. As I already said the visual designing in android are done with XML. So we can also write codes to design our app. To code for designing we can go to the Text Option from #4
#4
From here we can switch from visual drop down design to xml coding and vice versa.
#5
Here you can see all the components used in your screen in an hierarchical manner.
#6
Here you can see all the properties of the currently selected component.
Now I am wrapping up this part of android app development tutorial here. This was the basics about Android Studio IDE. From the next posts of this Android Development Tutorial Series we will start making some apps. Till then stay tuned and share the post if you liked it. Thank You 🙂
Next Post: Button and Edit Text
Prev Post: Android Application Development Tutorial from Scratch


