
Hello folks! This is the second post on React Native Tutorial. In this post, we are going to learn about the project structure of a react native project, what IDE we should use and using some basic layout elements such as Text (to display certain text), Button (you know it) and View (to encapsulate the layout) and so on.
If you are an absolute newbie then you should start from the first post of our React Native Tutorial. Follow the link below to go through to first post of this React Native Tutorial Series.
React Native Tutorial – Getting Started
To begin with, let us create a new react native project. If you don’t know how to create a new project in react native and haven’t set up the work environment for react native then, do read the previous post on react native for which link is given below.
Creating a New React Native Project
Assuming that you have the work environment setup for react native, to create a new project, do the following:-
- Open command prompt and navigate to the directory where you’d like to store you react native project.
- Once you’re into the directory, type the command react-native init basicuiapp. Here, basicuiapp is the name of the app
- Sit back and relax as the project is being built as it’s gonna take a while.
- Wait for the screen similar to the one shown below to appear
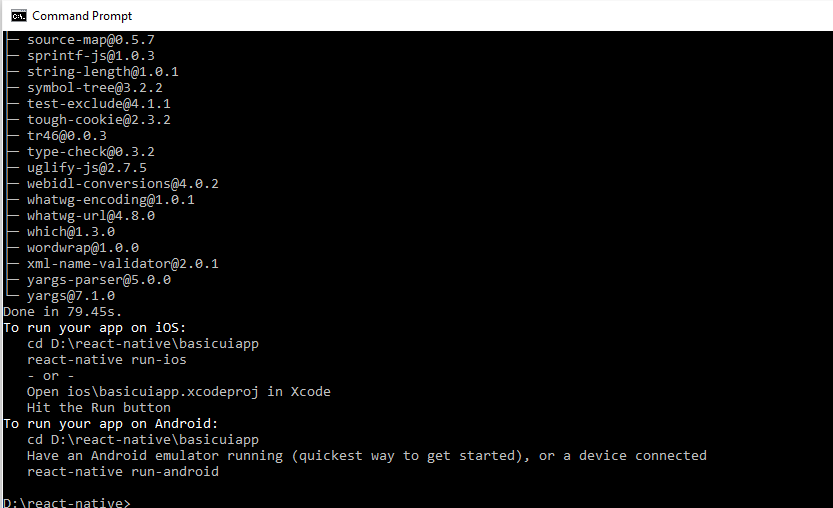
- Once you spot the screen above, it means that your project has been successfully built.
Now, it’s time to explore the contents of the project. To do so, you could use any text editor such as notepad++ or sublime but I personally recommend to use WEBSTORM as it makes things quite easy.
React Native Project Structure
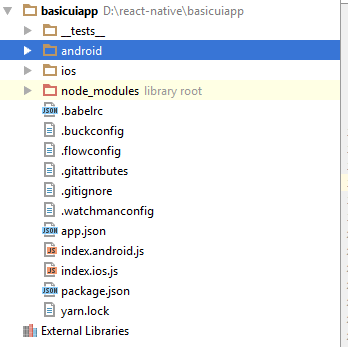
Go ahead and open the project and you shall see bunch of folders and files similar to the image shown below:-
If you are new to react native, I know exactly how it feels coz I have been through that stage. But don’t worry, I ‘ve got your back and we shall learn what this project structure is all about.
- We have two folders by the names android and ios. These folders contain project files related
to the development of android and ios applications. Talking of the android folder, it’s contents
are pretty similar to what we see in a normal android studio project. It has some xml files and some java
classes and so on. The thing which we need to keep in mind here is that for most of our works in developing
a react native application, we won’t be dealing with these folders called android and ios.
In rarest of the cases we are going to face that situation. - Next, we have a folder by the name node-modules. It contains all the dependencies of react-native.
Again, we don’t have to deal with it while working on apps. It already has the dependencies setup which would be required. - Next, we have two files by the names index.android.js and indes.ios.js. 99% of the work as we develop
apps would be done on these two files on the basis of platform. Like for configuring an app for
android, we’d configure index.android.js and vice-versa.
Ah, I can see that smile on your face now that you have learnt what’s all this fuss is about.
Building a Simple Screen
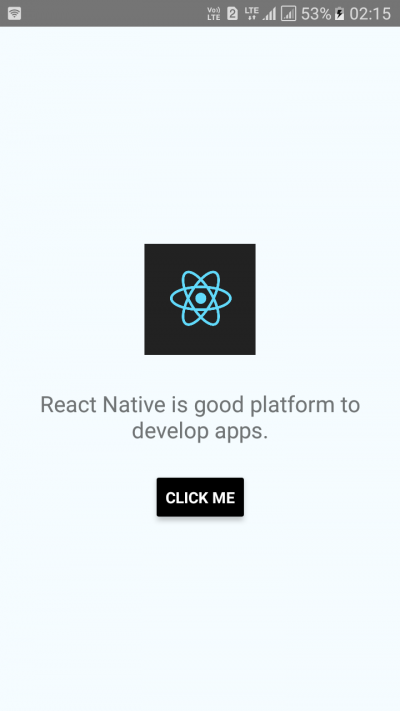
- To learn the UI widgets, we shall build a simple screen in our app as shown below.
- To begin coding the screen, we need to make some imports of classes just as we do in usual coding.
- To do so, open the index.android.js file, clear it completely and write the code shown below:-
|
1 2 3 4 5 6 7 8 9 10 11 12 |
import React, { Component } from 'react'; import { AppRegistry, StyleSheet, Text, View, Button, Image, ToastAndroid, } from 'react-native'; |
- In the above code, we import the classes we’re going to use in the further codes. For example AppRegistry is used to register a component to the app, Component class is used to define a component of an app and the rest you’ll learn as we go further.
- Next, we need to define a component for the app. To do so, below the imports, write the code as shown below:-
|
1 2 3 4 5 6 7 8 9 10 11 12 13 |
class basicuiapp extends Component{ render(){ return( ); } } |
- In the above code, we have a class defined by the name basicuiapp which inherits to Component class. It also has two functions namely render and return. The render function is supposed to render the contents of the what is returned by the return function. The return function encapsulates all the ui stuff which is later passed onto the render function.
- Now, we shall begin with designing UI of the screen. To do so, copy the code shown below and paste it into the parenthesis of the return function
|
1 2 3 4 5 6 7 8 9 10 11 12 13 14 15 16 |
<View > <Image source={{uri: 'https://facebook.github.io/react/img/logo_og.png'}} /> <Text>React Native is good platform to develop apps.</Text> <Button onPress={this.onPressed} title="Click me" color="#000000" /> </View> |
- In the above code, we have View as the parent layout which is equivalent to the linear layout in android whose orientation is vertical by default. Then we have an Image at the top in which an image is being loaded using a URL. Below the image, we have the Text element simply to display some information and below the text widget we have the Button widget with some attributes mentioned.
- Now, we need to do some styling with the above UI widgets regarding their orientation, position, fontsize etcetra.
- To configure such properties in react-native, we do it in a manner similar to css used in web development. Don’t worry if you have no clue of css. You shall learn it easily. Just keep moving ahead.
|
1 2 3 4 5 6 7 8 9 10 11 12 13 14 15 16 17 18 19 20 21 22 23 24 25 26 27 |
const styles = StyleSheet.create({ //style for View container: { flex: 1, justifyContent: 'center', alignItems: 'center', backgroundColor: '#F5FCFF', }, // style for Text textStyle: { fontSize: 20, textAlign: 'center', margin: 10, paddingTop:20, paddingBottom:20, }, //style for Image imageContainer:{ alignItems:'center', marginTop:20, width:100, height:100, }, }); |
In the above code, I’d like to throw some light on certain properties such as flex, justifyContent and alignItems.
- Flex is a property equivalent to weight in android. When added to a layout with some numeric value, it decides the scale of that layout. The greater the value, the lesser is the scale.
- In that layout, once the scale is set by the value of flex, justifyContent and alignItems decide the position of the content of the layout vertically and horizontally respectively. Like for justifyContent, we have possible values as flex-start, center, flex-end, space-around, and space-between. These will position the contents of the layout vertically.
- Similarly, alignItems has certain possible values some of which are flex-start, center, flex-end, and stretch. It would align the layout horizontally within the layout.
Now update the content of the return function in the basicuiapp component as shown below:-
|
1 2 3 4 5 6 7 8 9 10 11 12 13 14 15 16 |
<View style={ styles.container } > <Image style={ styles.imageContainer } source={{uri: 'https://facebook.github.io/react/img/logo_og.png'}} /> <Text style={ styles.textStyle } >React Native is good platform to develop apps.</Text> <Button onPress={this.onPressed} title="Click me" color="#000000" /> </View> |
If you can spot in the above code then you’ll find that styles have been added to the respective widgets which we defined earlier.
Now, we need to define the onClick of the Button Widget. To do so, we need to define function which would be called when the button is pressed. We have already called that function if you can see it in the button widget as a value to the onPress attribute by the name onPresseed. To define this function, copy the code below and paste it in the basicuiapp class above the render method as shown below:-
|
1 2 3 4 5 |
onPressed(){ ToastAndroid.show('Hi, I am Toast. Catch me if you can.' , ToastAndroid.SHORT); } |
In the above code, a toast has been set up and it’ll show up once the button is clicked.
We’re almost done coding this screen.
Finally, we just need to register this component to the App using the AppRegistry class. To do so, copy the code below and paste it outside the basicuiapp class. This code will register the component basicuiapp to the app.
|
1 2 3 |
AppRegistry.registerComponent('basicuiapp', () => basicuiapp); |
Coding is complete and here is the final code.
|
1 2 3 4 5 6 7 8 9 10 11 12 13 14 15 16 17 18 19 20 21 22 23 24 25 26 27 28 29 30 31 32 33 34 35 36 37 38 39 40 41 42 43 44 45 46 47 48 49 50 51 52 53 54 55 56 57 58 59 60 61 62 63 64 65 66 67 68 69 70 71 72 73 74 |
import React, { Component } from 'react'; import { AppRegistry, StyleSheet, Text, View, Button, Image, ToastAndroid, } from 'react-native'; class basicuiapp extends Component{ //function called when button is pressed onPressed(){ ToastAndroid.show('Hi, I am Toast. Catch me if you can.' , ToastAndroid.SHORT); } //renders the contents of return function render(){ //returns the ui contents to render function return( <View style={ styles.container } > <Image style={ styles.imageContainer } source={{uri: 'https://facebook.github.io/react/img/logo_og.png'}} /> <Text style={ styles.textStyle } >React Native is good platform to develop apps.</Text> <Button //setting onclick listener onPress={this.onPressed} title="Click me" color="#000000" /> </View> ); } } // styles variable const styles = StyleSheet.create({ //style for View container: { flex: 1, justifyContent: 'center', alignItems: 'center', backgroundColor: '#F5FCFF', }, // style for Text textStyle: { fontSize: 20, textAlign: 'center', margin: 10, paddingTop:20, paddingBottom:20, }, //style for Image imageContainer:{ alignItems:'center', marginTop:20, width:100, height:100, }, }); //registering the component to the App AppRegistry.registerComponent('basicuiapp', () => basicuiapp); |
- Go ahead and run the app. To run the app, open command prompt in your project folder and type the command
react-native run-android
- On a sucessful run, you shall see an output as shown below:-
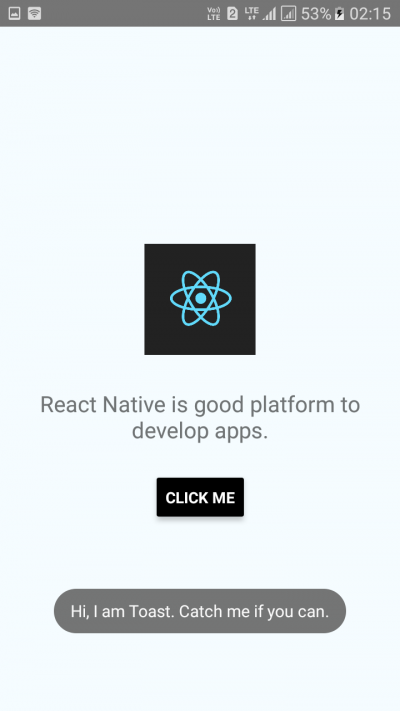
- Yay! You have successfully developed your first react native app.
So thats all for this post of React Native Tutorial friends, In the next post, we shall learn taking inputs and storing data locally in react native. So, stay tuned. And also feel free to give your feedbacks, and ask queries in the comment section.